Have you ever spent half a month designing a high-fidelity prototype, but it was denied within a few minutes? So much time and energy have been spent but in vain. I have met similar things so many times. However, such tragedy can be totally averted: the rapid low-fidelity prototype is a wise choice in prototype design.
1. What is a high-fidelity prototype and a low-fidelity prototype?
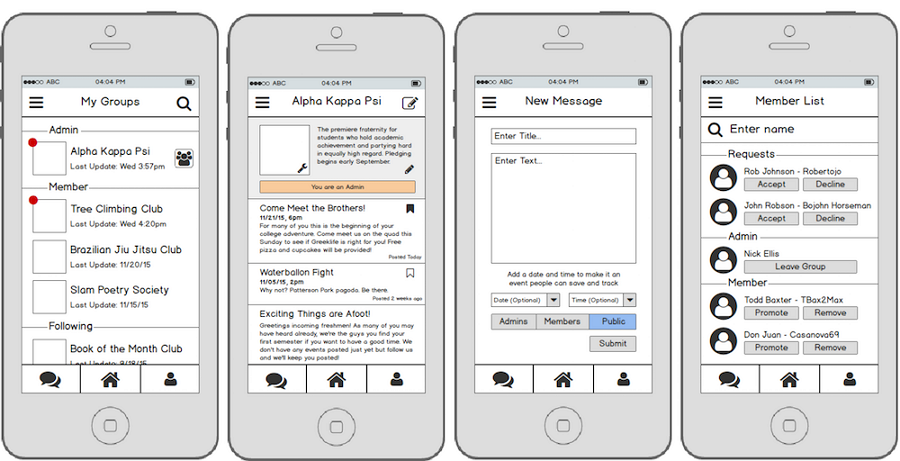
Low-fidelity prototype: it only focuses on functions, structures and processes; it only provides the most simple frameworks and elements; it generally does not provide color, butexpresses itself in grayscale.
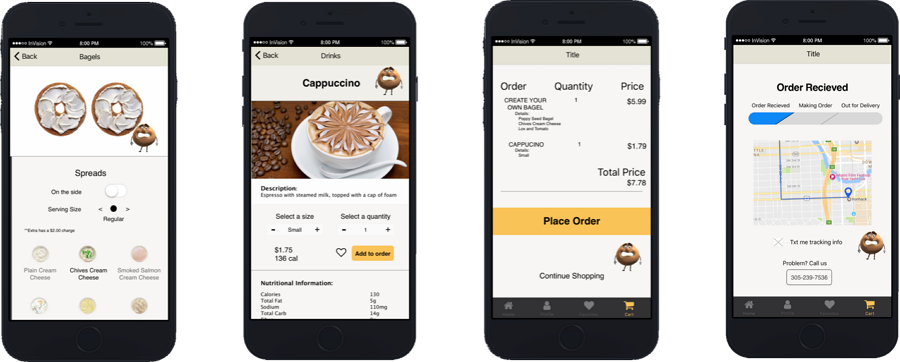
High-fidelity prototype: it provides more visual details; it is almost equivalent to a UI effect picture, and only needs to replace the actual data and materials in the development process.
2. Why make a low-fidelity prototype?
In product development, the goal of a prototype is to express its ideas, functions and content, in order to get feedback and improve the product. The most important challenge in interactive design is often the interface: it should be friendly and intuitive; it would better be clear at a glance.
In the development process, there are always continuous problems that need to be explained in form of a prototype: What elements do users perceive? How do components interact? What is the logic behind the whole system? Can user quickly understand this logic? Is the operation confusing? A prototype can help solve practical problems based on the value in use, so as to make the best design.
In the face of external customers, the visual fidelity of a prototype can be more important,which can help customers better understand the design. Moreover, a prototype with high visual fidelity can be more convincing during the proposal. Shortcomings are also obvious. It takes a lot of time to make a high-fidelity prototype and will take even much more time when there need to be some changes in the design.
In the early stage of a project, it is generally difficult to do a prototype with high visual fidelityand its application is also limited during the entire design process.
Therefore, if it is not necessary to propose to external customers but only for internal communication and inspection on the interaction, the visual fidelity can be put on the back corner and the fidelity of the interaction should be taken as the main dimension. What we should pursue are speed and quantity, as many attempts and iterations as possible need to be made in the early period of product development, to find new ideas and reduce the risk in the late stages of a project.
All in all, the advantages of low-fidelity prototypes are as follows:
A. It makes it easier to detect and repair the main issues early.
A low-fidelity prototype makes it quick to access the user's feedback, help to visualize problems and solve the core problems of a product on the ease of use and functionality.
B. Low-fidelity prototypes are easier and less costly to build.
Regardless of individuals or groups, you can build a low-fidelity prototype with little or no professional UX design skills and can build it with little or no budget in a very short time.
C. What counts is not to implement but to get user feedback to focus on the concept of high-level.
A high-fidelity prototype lays its emphasis on the aesthetic degree of the product rather than verifying the product's fundamental assumptions and core values. However, a rough low-fidelity prototype, on the other, can force the user to think about the core content of a product rather than its appearance.
D. It makes us be more motivated and willing to make iterations.
Iteration is the real key to the flexible design process.
3. We need rapid prototyping!
The definition of rapid prototyping in my view is: it’s a prototype design activity with the main purpose of finding new ideas and test design in the early period of product development.
Look back on previous design experiences, and it will be easy to find that when we are repeatedly polishing a design and lose the thread, the best way to find a solution is to give up the old one and start a new one. However, to give up a design that a lot of time and energy have been spent on is terribly difficult for designers. The more a design is completed, the more possibly a designer choose to improve it rather than start to do a new design from scratch.
So rapidness means a lot in rapid prototyping. Only efficiency can assure quantity.
4. Is there any good rapid prototyping tools?
Almost every prototype design tool I've tried has claimed that they are "rapid", but which is really good one? Which is the best software tool for rapid prototyping? I think there should be few requirements as follows:
A. Low costs of learning and using;
B. Fast and efficient drawing function;
C. Able to make interactive actions.
There are several tools living up to the requirements above. Though Axure RP and Omni Graffle is quite difficult to learn, the two can absolutely be used to do rapid prototyping for someone who has adapted to them. Owing to its vast stencils, Omini Graffle is especially suitable to be used to do rapid prototyping.
Additionally, I highly recommend a prototyping tool, Mockplus.

Mockplus is a tool concentrating on making prototyping faster and easier. Its main features are as follows:
A. Massive icons (3000) and components (200) which are out-of-box and help to do fast prototyping. (The most numerous compared with congeneric tools)
B. Highly packaged interactive components which are intelligent and instantly available. (Unique)
C. Popup panels and content pane which can be edited flexibly. (Unique)
D. Totally visualized interactive design: component interactions can be set just by drags and drops, which is extremely simple and intuitive. (Unique)
E. Automatic one-key reset of interactive commands. (Unique)
F. Format Painter and Paste Style which help to do a batch copy and hence make operation foolproof. (The best compared with congeneric tools)
G. Six ways to preview which make it more convenient for demonstration: (The Most numerous compared with congeneric tools)
Export to images; view prototypes on mobile by scanning QR code; export to demo package; export to HTML5 offline; publish online as an H5 web app and view in real time; input view code in mobile client app and view in real time.
H. Team collaboration. (The easiest-to-use; its collaboration plus online review function is unique compared with congeneric tools.)
It can be seen that all the functions of Mockplus mentioned above are aimed at rapid design. If now you understand the benefits of rapid design and low-fidelity prototypes and need a good tool to assist you, why not download Mockplus and have a try?
Know More About Mockplus:
Comments
Post a Comment